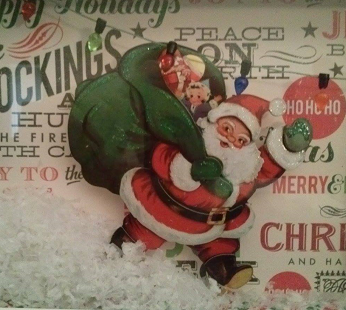
Today I am going to share with you my first Christmas project of the season. It also happens to be my submission for the altered art design team for The Robin's Nest. So excited!!
1. Choose a shadow box, (for this project I used a 5x7) paper, stickers, washi tape, Christmas snow, and any other embellishments you want to add based on your theme.
2. Take the back off of your shadowbox and use it as a template for cutting your paper background.
3.Add your images. Tip: My sticker had 3d foam on the back, but I added more on top of the existing. This helped give it a more dimensional look on the page.
4. I used washi tape to decorate the outside frame and inside edge of the shadow box.
5. Add any other elements you want to add to the background or edges. This is how I attached the string of small Christmas lights for mine. I showed the washi tape off a little so you could see it. For the final I lined up the pattern so that it is seamless.
6. Next add the snow in one of the corners of the shadow box. After you attach the back you can tilt the box to distribute the snow where you want it.
7. Put the shadow box back on, turn over, tilt and shake to distribute the snow and you are done!
Doesn't Santa looks like he is walking through the snow?
You can hang this on the wall, sit on a side table, or add it to a table scape. I am having so much fun with this quick and easy project I am going to make more.
Here is another one I finished. The alphabet stickers I added to the glass to give it more interest. Next I am going to try a baking theme for the kitchen. Fun, Fun, Fun!
Hope you enjoyed this project as much as I did. I would love to see what your creative minds have come up with. Feel free to post to my blog. #chatteringrobins # therobinsnest #christmascraft
#shadowboxideas
Shari

.png)


.png)

1 comment:
oh, this is super cute, love this idea, thanks for your interest in being on the Robin Nest Dt
Post a Comment